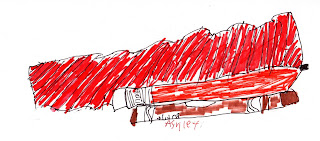
A couple of months ago I was shown a photograph of a fabric print and asked to do some design work including that print. I realized I had no way of knowing how large the motif actually was because I had nothing in the photo to compare it with. I went back to the manufacturer and they resent me the picture with a ruler laying on the fabric. In this art class we talked about using "comparison" as a model to let the viewer know how large/small something actually is. I had a package of Twizzlers Candy and let the kids eat part of it. I also told them we were going to draw the portion they had remaining. I talked a bit about things that we all know the size of for sure. For example, money... placing a penny next to something is a pretty good indicator something's real size. We decided everyone knew the real size of a crayon. By placing a crayon next to their candy they could compare the size remaining candy to the size of the crayon. Each student could draw the candy/crayon any size they wanted. The crayon and the candy just had to be in proportion to each other in thickness and length. They could finish the study by coloring it, using pencil or pen. Here are their results. I think they did a really great job understanding the concept and completing accurate drawings.
I'm Barb Schultz and I teach kids' art classes. I love spending time with kids, their excitement and curiosity are energizing. Helping them develop the skills to express their ideas is like letting the genie out of the bottle… get them started and just stand back. Their accomplishments are amazing! Please visit my website www.enchantedvalleyarts.com for information about signing up for classes.
Sunday, August 16, 2015
Sunday, August 9, 2015
Leaf Rubbings using aluminum foil
A few weeks ago I was searching Pinterest for some new art lesson ideas and ran across the project below. I had all the necessary supplies and here in the Pacific Northwest we have so many beautiful leaves I decided to give it a try. The whole project turned out far better than I ever guessed it would! First use spray glue to stick the leaf to a piece of mat board. Put the side with the most vein texture up. Spray it with glue again and cover it with regular aluminum foil. Use your fingertips to press/ softly rub the foil into all the cracks and crevices of the leaf. (Even delicate leaves work really well.) Fold the excess foil to the back. Spray the whole thing with black spray paint. Let it dry about an hour and then use really fine steel wool to rub the paint off the high spots. The pictures don't do these justice. They are gorgeous! In fact, the kids got out of the classroom before I had pictures of all of them. They are just the thing for name tags or something special on an elegantThanksgiving Day Table.
Sunday, August 2, 2015
Creative You Summer Sewing Camp
For the past several summers I've had the pleasure to be part of summer sewing camps sponsored by the Clothing and Textile Advisers of Kitsap County. I helped with two "Creative You" camps where campers dyed fabrics using such fun methods as ice dyeing and shibori dyeing. We also did sun painting, a process where you apply thespecial paint to the fabric then cover it with leaves, flowers and other cut out designs and leave it to dry in the sun. Everywhere you place the items on the painted cloth the dye does not react with the fabric. You end up with this amazing shadowy effect that is really beautiful. The kids also had the opportunity to learn about wool felting. They did a wet felt process and well as learning to needle felt. They spent the last two days turning their beautiful artistic fabric into book covers, purses, tote bags, pillows and stuffed animals.Their projects turned out incredible. It was a blast!!
Subscribe to:
Posts (Atom)


