Monday, May 25, 2015

Memorial Day Poppies

Today in art class we created poppy artwork in honor of Memorial Day.  I asked the kids if they'd seen anyone wearing red, paper poppies on the shirts and asked if they knew why.  I talked about symbols and how they help us remember important stuff.  We talked about World War I being fought in Europe and about the poem "Flanders Field" by John McCrae.  (Several of the kids knew about it from school.)  Keeping all of that I mind we created our pieces in watercolor by using a straw and watercolor along the bottom of the page to create the grassy field. We got fresh water (excellent opportunity to talk about complimentary colors and what happens when you mix green paint water with red paint...).  We put little puddles of water each place we wanted a poppy and dripped yellow, orange and red paint into the puddle and tipped our papers to get the colors to run together.  As they drying purple was added to create the dark centers.  After projects dried some chose to add pen and ink details.  The results are wonderful!


Tuesday, May 12, 2015

Floating Spheres

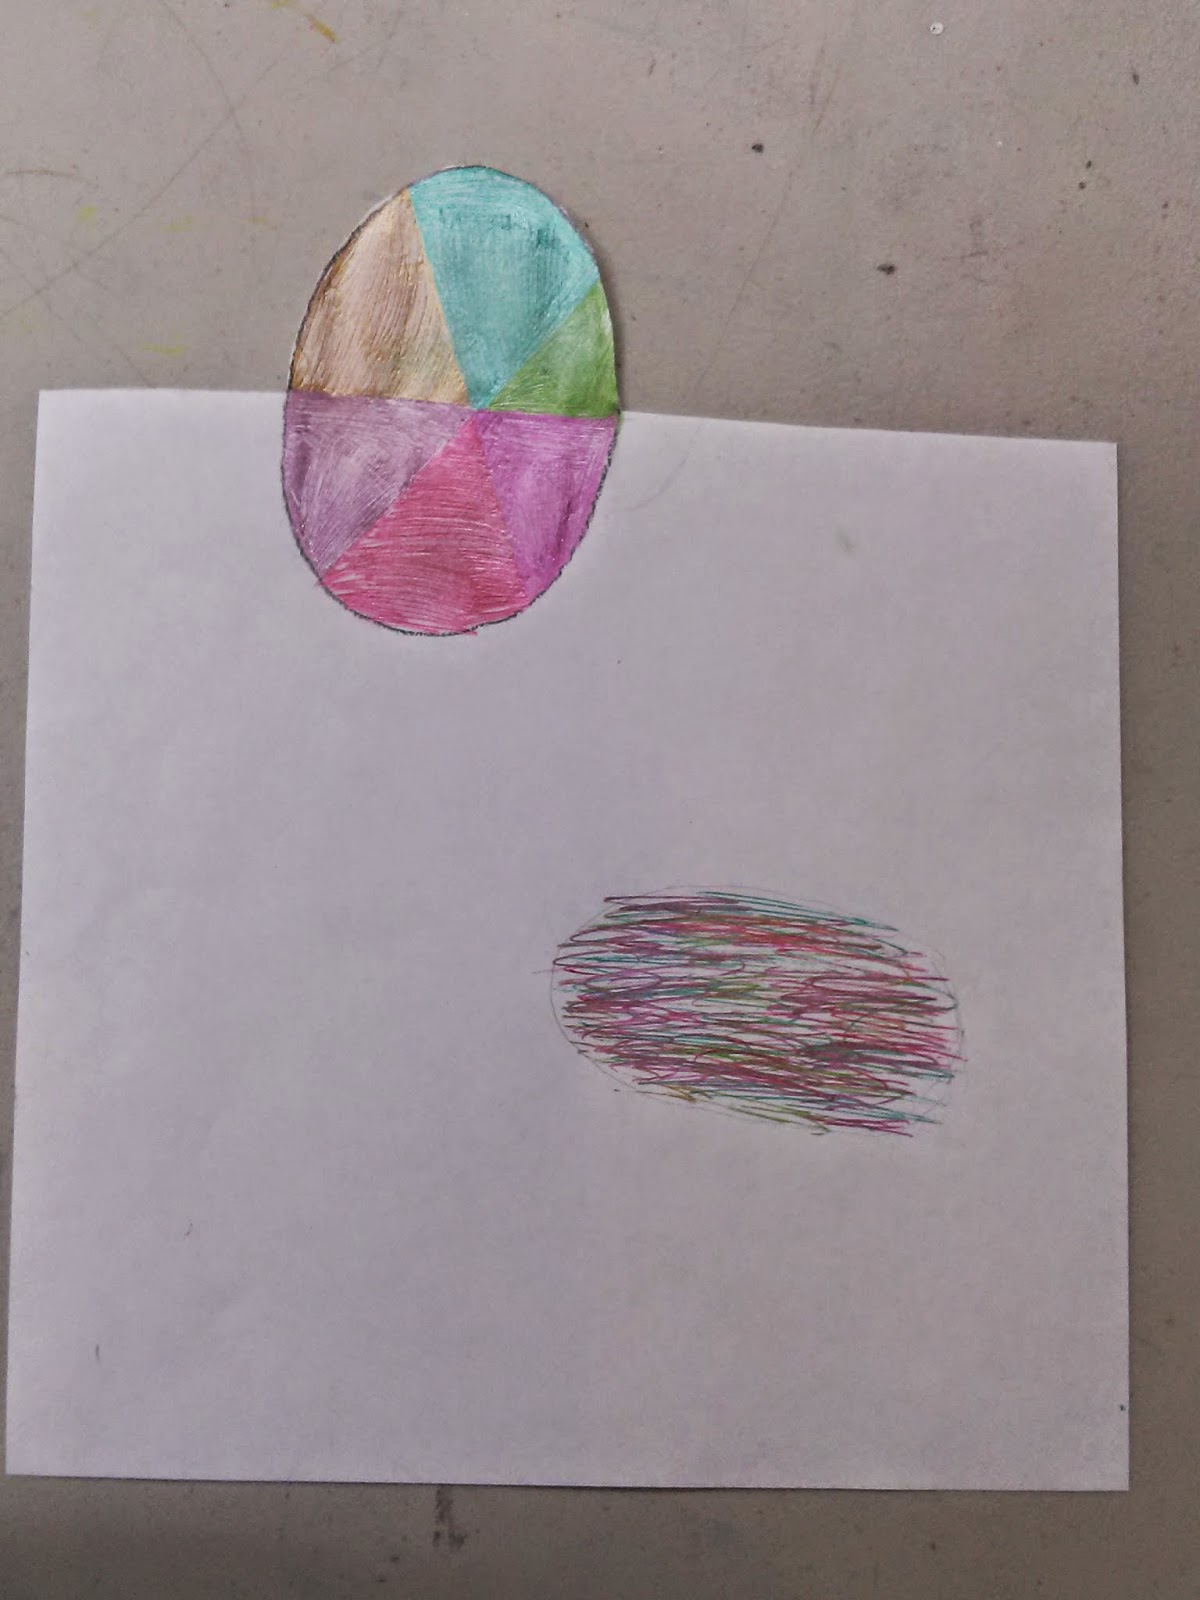
This week in art class we used our phones, Ipads, Ipods and cameras to create optical illusions with our artwork.  We created and shaded oval shapes and added a dark shaded oval just off to one side.  We added a "horizon line" keeping that line parallel with the top edge of the paper, then we cut along the line and around the top half of our ovals.  The first pictures show our pictures "straight on".  Then we tilted our cameras and photographed our artwork from an angle. It was so cool!  I looked like our ovals were balls floating above the paper.  Really fun project!!!

 
These are photos of our drawings "straight on"...


The floating sphere illusion is created by titling the camera when taking the photo.


Monday, December 22, 2014

Glowing Lights


It's the last class before Christmas and the kids created these wonderful glowing lights.  We had been talking about the importance of contrast and this project was a perfect example.  I found the lesson on Pinterest... search "draw Christmas Lights"...


Saturday, December 20, 2014

Merry Christmas 2014


Each year my students create designs for Christmas cards.  While it's always a great opportunity for them to create it also gives me a chance to "sneak in" a little lesson about the business of art.  I set up the each card on my computer and print a test copy for the kids to review and sign off on.  They have to sign and title their work.   I have them check for spelling errors, reversed images, off center, etc.  They sign and date it to verify they've seen it and agree it's ready to publish.  We talk about whether they're selling their design, selling cards, copyrights, how to figure out what to charge.  Some of my students as young as eight so this isn't a really long conversation, but it introduces them to some things to think about if they want to sell their artwork.  Enjoy their designs as well as their titles... 
 
 
"Flight of the Cardinal"
 

"Kitten Claus"
 

"Charlie Brown Christmas"
 

"Olaf Hits the Beach"
 

"Happy Kris Moose"
 

"Oh, deer"
 

"Home Sweet Home"
 

"Tree Lighting"
 

"Maneki Neko"
 

"It's Not a Silent Night, It's a Dark Knight"
 

"Holiday Season"
 

"Joy"

Monday, October 20, 2014

Spooky Luminaries

A sewing friend created the most charming luminaries using her sewing machine.  I adapted the project for my art students and here are the results.  We used brown lunch bags and sketched our designs on in pencil.  We discussed how contour drawing is about capturing the edges of images and silhouettes are similar to contour drawings.  We also talked about "negative space" and how important it is to a picture.  In this project it is very important because it is the space that will light up when we are finished. Sketches were filled in with black acrylic craft paint and allowed to dry.  (We used a hair dryer to speed up the process.)  The negative space as filled in with a Q-tip dipped in vegetable oil.  Note:  It is important to have the area to be coated in vegetable oil completely surrounded by paint.  It stops the oil from bleeding out into the paper.  Don't overdo the vegetable oil.  Dabbing the swab on a paper towel before application helps.  Battery powered tea lights were used to illuminate our bags.  


Here are the bags in the classroom without their glow...  (the darker areas are where we put the vegetable oil)